 I am a huge fan of Halloween and before we had kids, the hubs and I used to host a spooktacular evening each year for our friends. Both kids were born very close to Halloween and so it has been a bit difficult for me to do back to back parties. Don’t get me wrong, we still continued to celebrate Halloween just not with the pizzazz we used to. This year we’re switching things up! I’m going for the back to back party weekends and have big plans for their birthday celebration and our adults Halloween bash. Life is better together and I am not one to shy away from a celebratory gathering! We still want to do something Halloween related with the kids so we’ve decided to host a Non-Halloween, Halloween with the other parents in our building. Most kids in our condo are under the age of 4 and we really don’t want to spook them out. Instead, we want it to be a fun gathering filled with cute little ones running around in the most adorable outfits. After all, for the under 4 set, the candy and dress up is what it’s about. We’re keeping the blood, gore and guts for our BOOzy party with our friends.
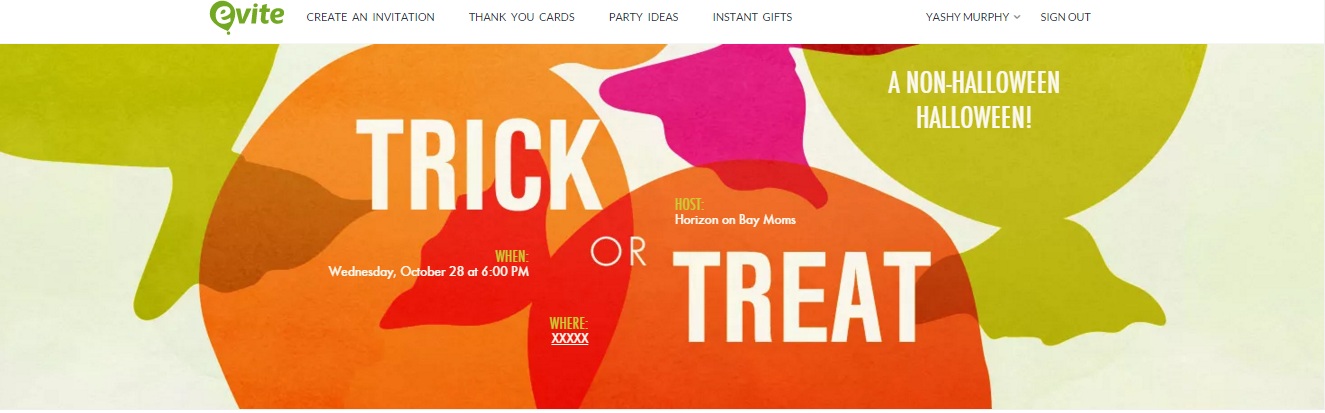
For our kids’ Halloween bash, which we’re hosting mid week, I really want to stay away from the usual black, white and spooky. Little Monkey and Baby Boy are fine with ghost stickers and pumpkins but they shy away from anything creepy and I figured the other kids would too.
Evite has a great selection of Halloween invitations and I chose this brightly coloured one.
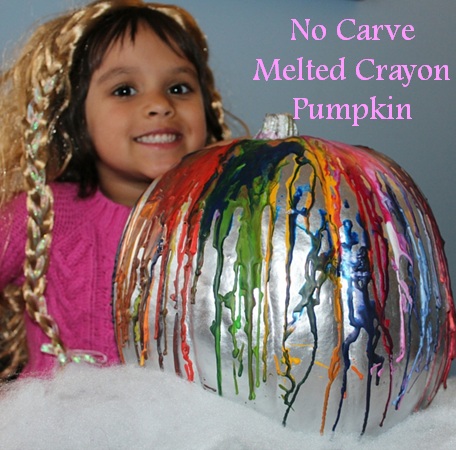
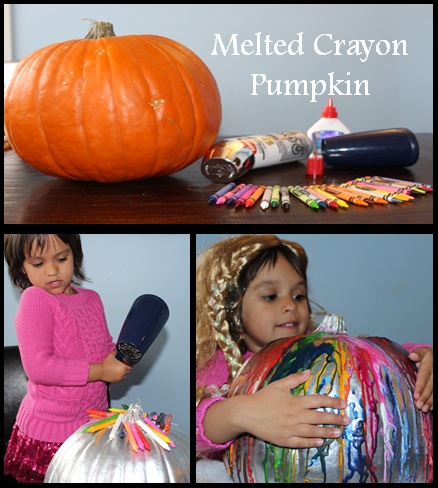
Little Monkey and I were planning to carve our pumpkins this weekend but I was getting a bit lazy AND she mentioned that carving is boring. Inspired by the Evite’s bright colours, I thought “why not create a brightly coloured pumpkin this year?” We’ve all allowed candles to drip on empty wine bottles and this year’s pumpkin looks a bit like those wine bottles. All we needed was crayons, some white glue and a hair dryer! As we went shopping, Little Monkey added her own twist to our project and asked if we could have a shiny pumpkin and that’s how we ended up with a silver base.
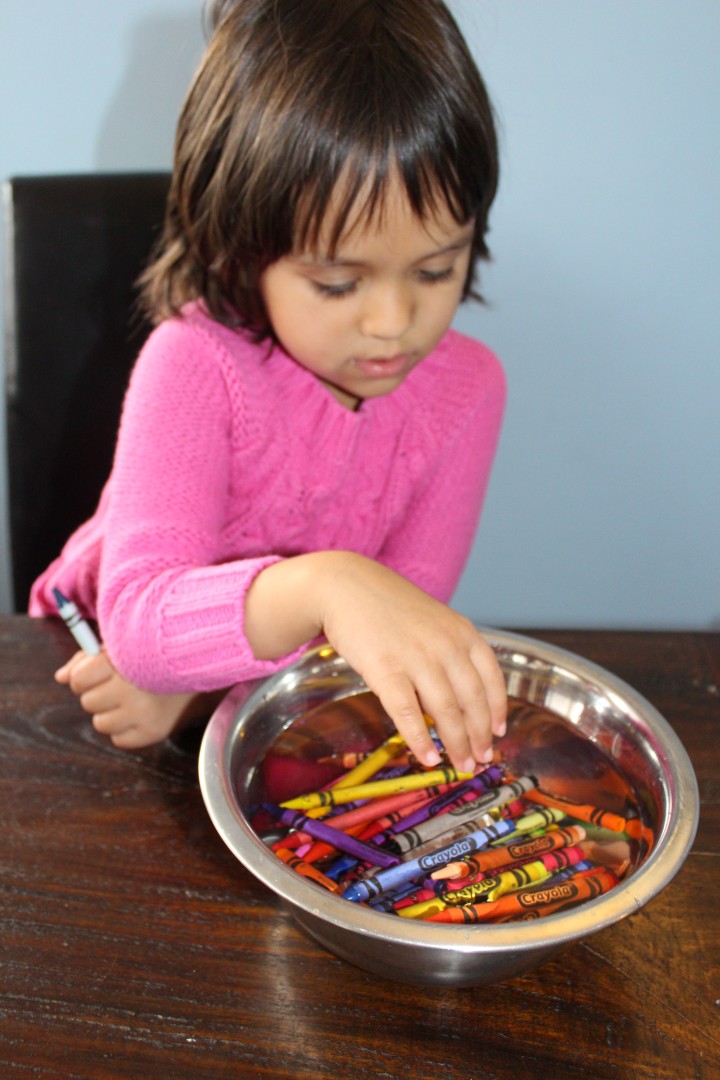 We grabbed a fairly large pumpkin and spray painted it with a metallic base (use paint that can be used on wood, plastic and acrylic). We left this to dry in our condo stairway for an hour. While that was drying we plopped 30 crayons into a bowl of warm water and watched the wrappers slide off. We then took the wrapper-less crayons and dried them on a cloth.
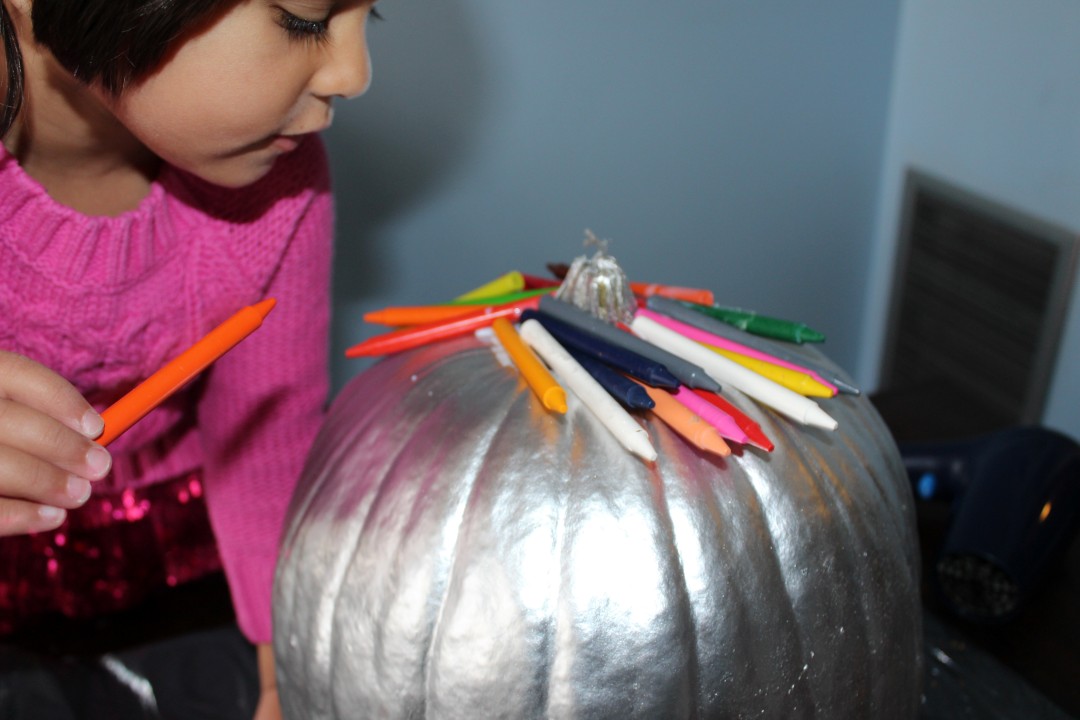
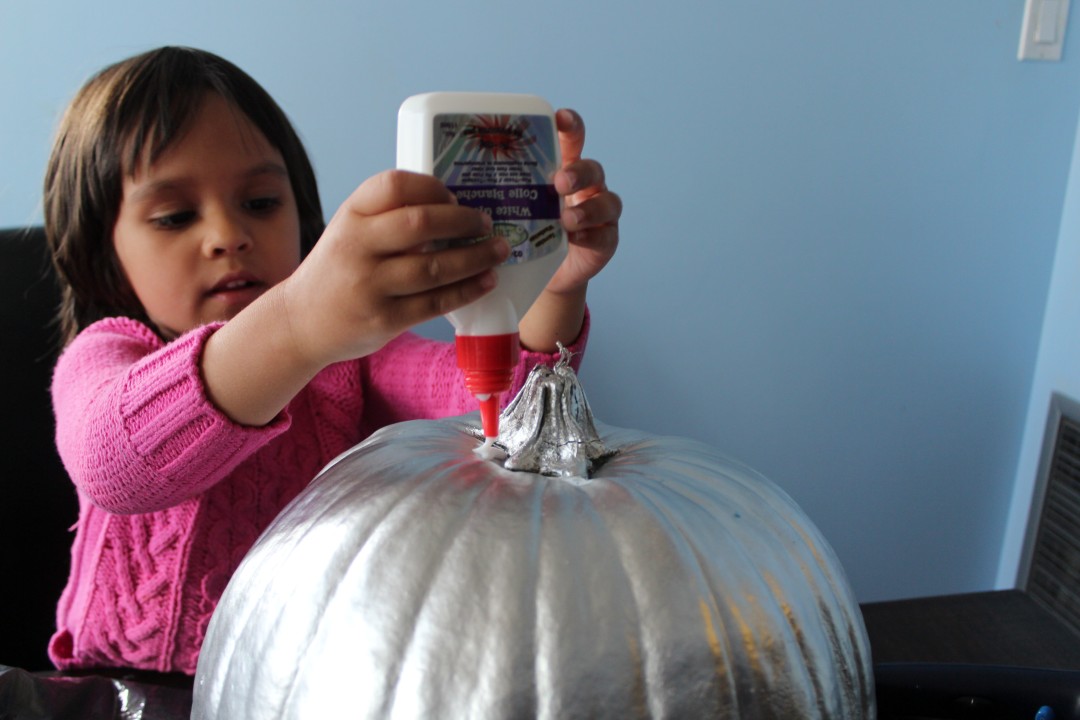 Given the limited space in our condo, we decided to do this project on our dining table. Just remember to layer the entire table with old paper or plastic sheets as we ended with quite a few crayon splatters across our walls and the uncovered parts of the table. Place the Pumpkin on a flat surface and then apply a thick dollop of white glue by the stem. You want it to be nice and thick so that the crayons can be arranged without sliding down. Little Monkey needed quite a bit of help with this part and I pretty much took over the project from here on in.
Once the crayons are arranged all you have to do is turn the hairdryer on and watch the crayons melt! A colourful splatter trickled down and created a wonderful pattern. It was fun hearing Little Monkey squeal in delight as the colours took a life of their own.
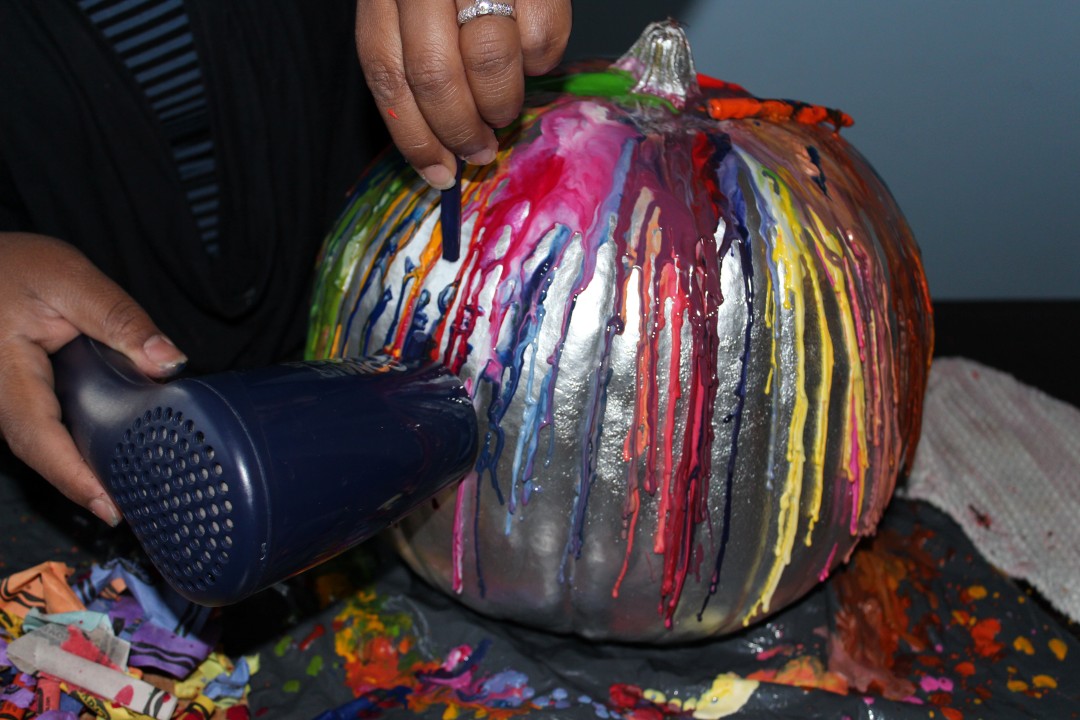
Here’s a tip, keep a few extra whites and yellows on the side for when colours get murky. Simply place one of these whites or yellows by those blended patches and you’ll get a nice bright break in-between. Also, don’t be afraid to play with the direction of the hairdryer… I started from above but soon started pointing it in different directions and controlled the direction of the trickle. You can also use old broken crayons for this project and if there’s any unsplattered parts, use the broken ones on that area – just ensure you don’t burn your fingers!
I’m so excited to put this outside our door when the Little Trick or Treaters come by!! I know it’s going to be a hit with them and best of all, no carving was involved! This is one pretty no carve pumpkin, if I do say so myself! The spray paint and the hair dryer tends to ‘cook’ the pumpkin, so this guy won’t be around for more than two weeks, however given that it only took us 2 hours to make it, it can easily be done the week of any event. I may even try to do a similar one for our Christmas parties! Can’t you just picture a red and green splattered pumpkin as a centre piece? Now all I have to do is make our treat bags and I’m thinking of sticking with the multi-coloured theme and grabbing a bunch of stickers and fruit gummies to hand out.
Now… what should I dress up as for Halloween? Something brightly coloured to match MY pumpkin, perhaps?


Salma
October 19, 2015 at 4:58 pmI never would have thought of using melted crayons to decorate a pumpkin. It looks really great!
Yashy
October 22, 2015 at 7:47 pmThank you!! It was fun and best of all.. EASY!
Yuen C
October 19, 2015 at 11:48 pmWhat a great idea, I want to try that!
Yashy
October 22, 2015 at 7:47 pmDo share pics with us if you do! Would love to see your creation
Meg A
November 14, 2015 at 10:33 pmI’ve used melted crayons before but, this combination is new. That’s also my first time to see a silver pumpkin. It reminds me of Cinderella, somewhat.
Yashy
November 15, 2015 at 10:08 amOh my gosh!! You’re right..it does remind me of Cinderella too!